
Vatech Case Study · Tooth 11 Fracture
While OPG imaging is a very powerful diagnostic tool, it can sometimes be hard to spot certain tooth pathologies due to the nature of OPG images. While it is still completely manageable to conclude a diagnosis with the help of an OPG image, a CBCT image can help accelerate the diagnostic process considerably.
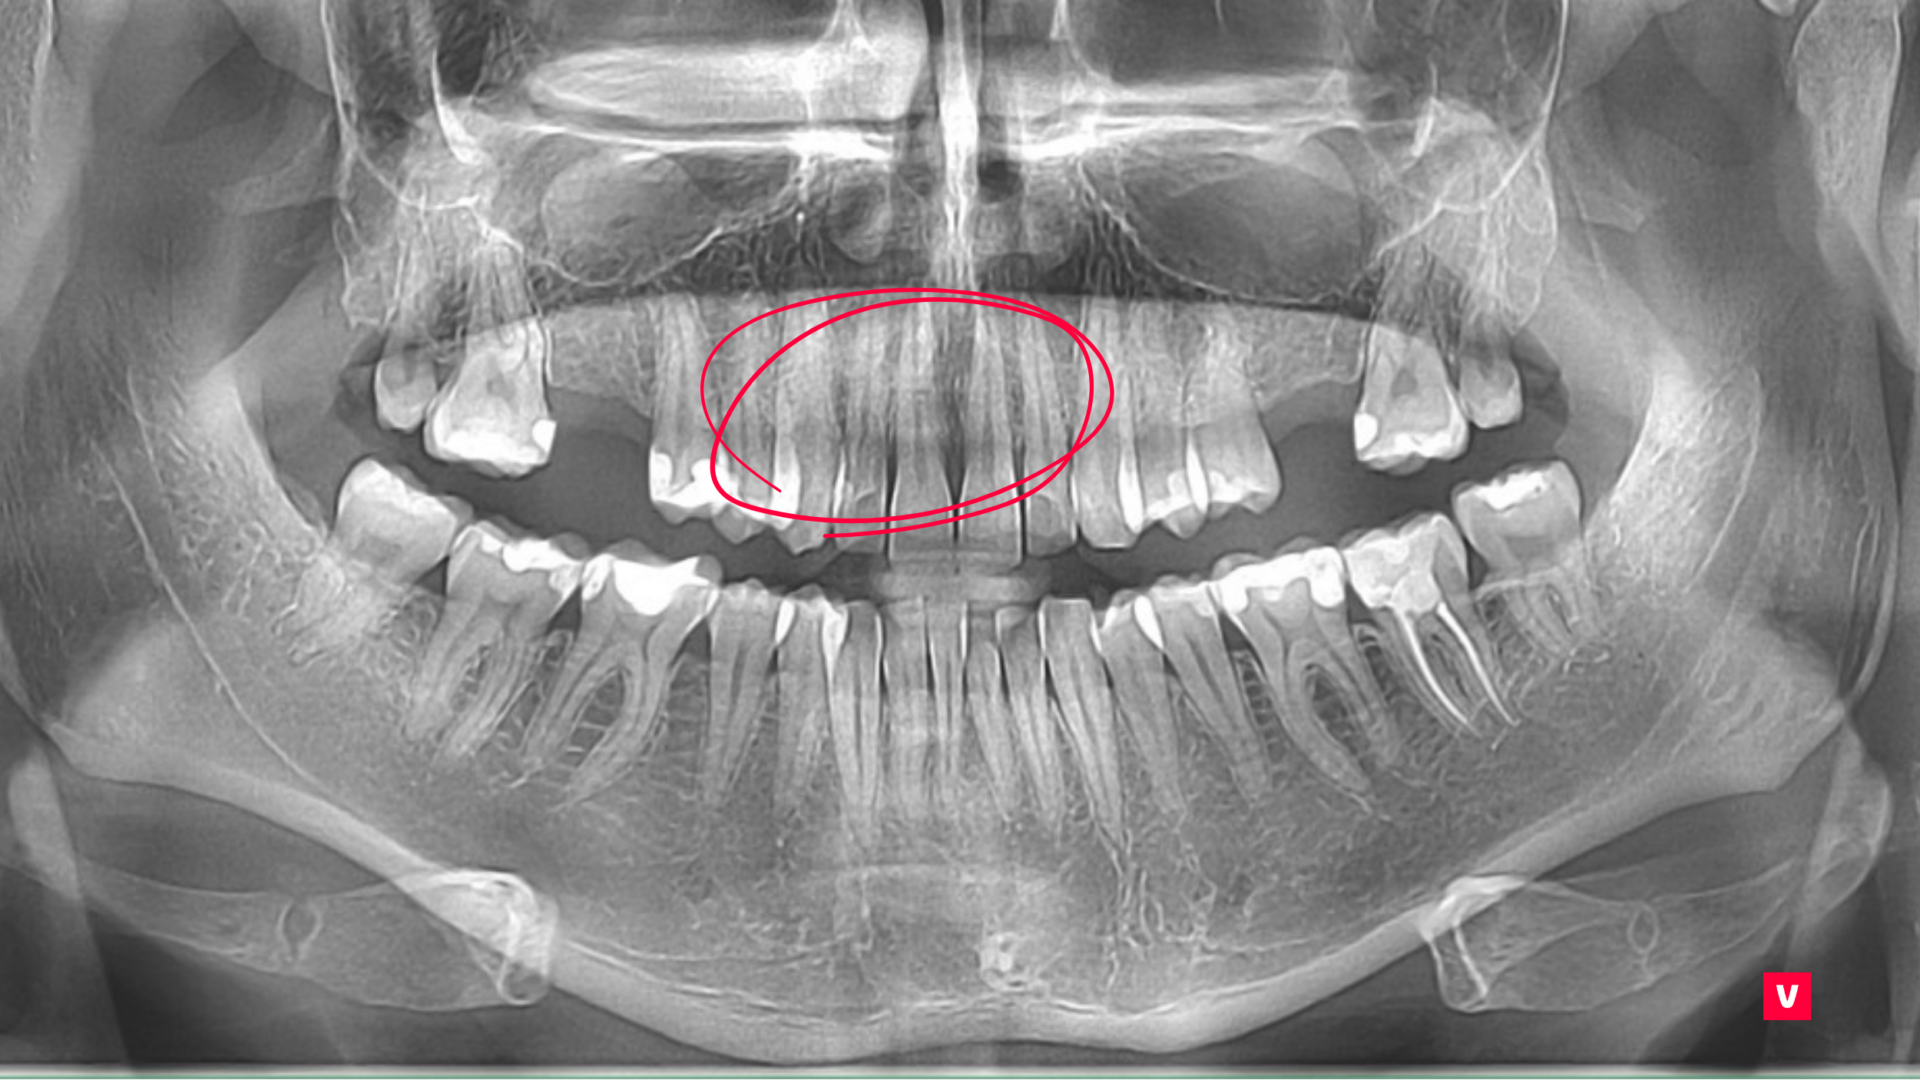
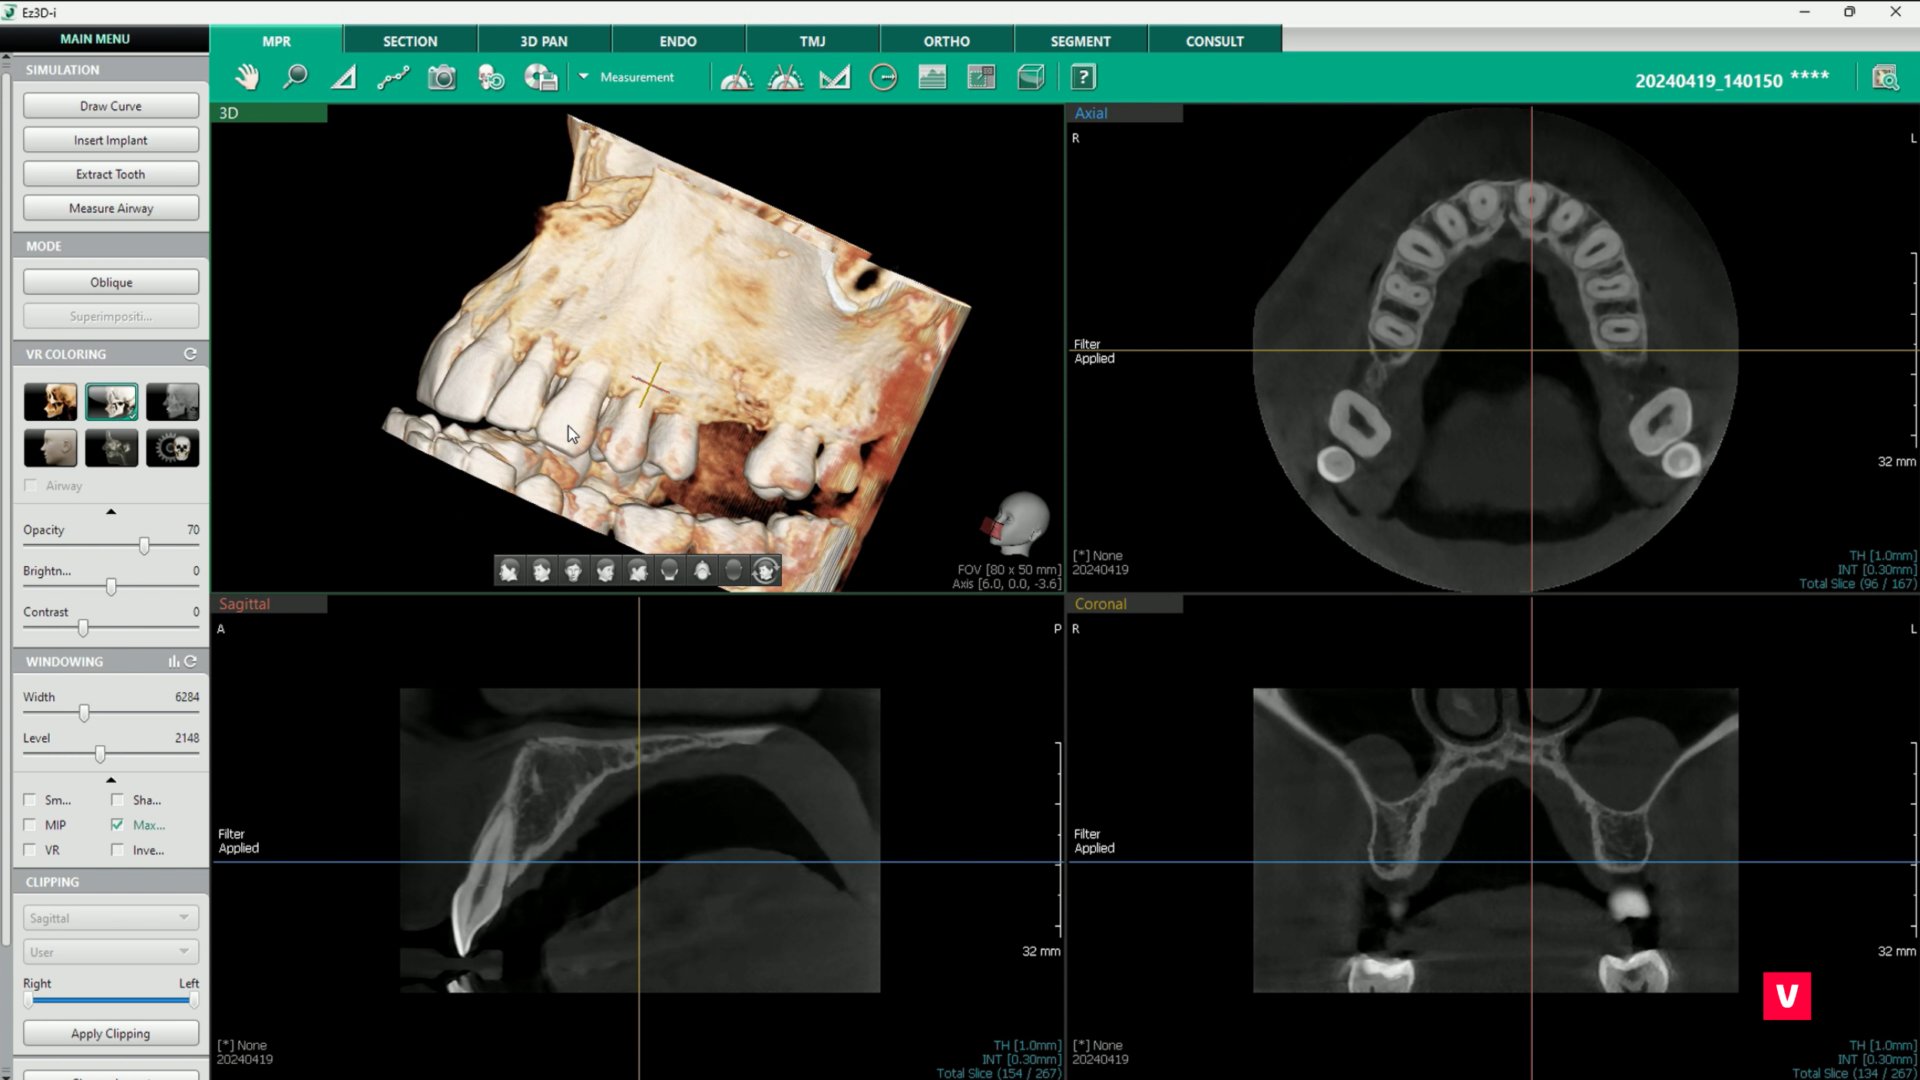
The patient complained about persistent pain in his tooth 11. The OPG image didn’t show any particular root of the problem. The dentist decided to scan the patient with CBCT machine as well for his peace of mind. The 3D image confirmed his suspicions – the root of the tooth 11 was fractured.
The application of CBCT imaging saved the doctor a lot of time that he could now dedicate to the treatment of the patient. We will go through the tools the doctor used in his diagnosis so that your workflow can be improved and faster as well.
If you want to see a quick overview of the case, you can do so in the video at the end of the article.
3 main software features in the Section tab of the, Vatech software, Ez3D-i, were used doing today’s diagnosis:
1) Reconstruction of a 2D section along the curve
2) Max Sharpen filter
3) Layout modification
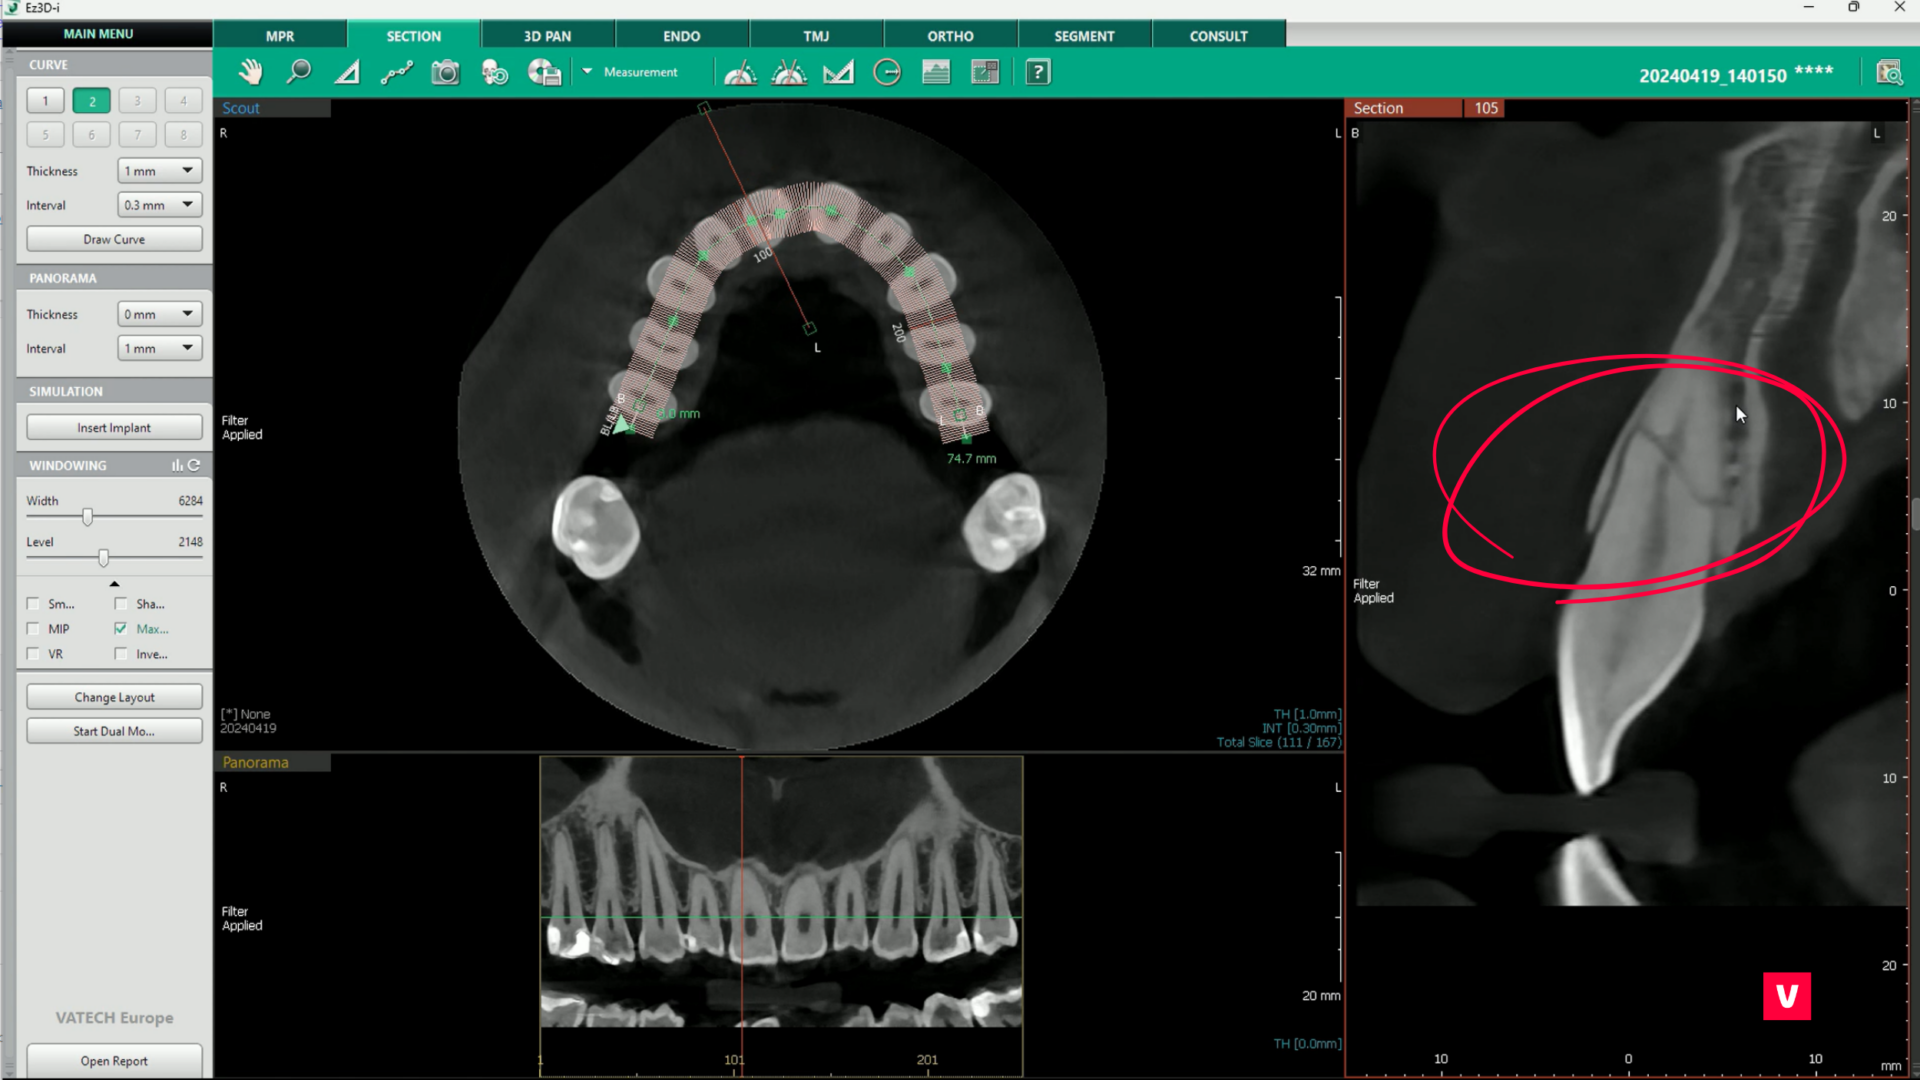
1) Reconstruction of a 2D section
The Section tab can provide a lot of useful diagnostic information. Not only does it provide another look into the teeth which allows for better diagnostic accuracy, it also helps with finding the mandibular canal and therefore is a good helper in the process of placing implants.
The beginning of our work at this space is at a “Draw curve” tool. This tool helps us with reconstruction of the desired areas because, as opposed to the MPR tab, where the images are done according to the predetermined lines, we can determine the line ourselves. This gives us a lot more options.

If we also employ the tool which lets us adjust the thickness of the slice image, we will not miss any little details about the tooth condition. It also makes the search for mandibular canal a lot easier and safer.
The process of drawing the curve is very simple thanks to the option to add points, adjust the curve length, and move the curve.
In the case of the patient, we are studying today, the coronal plane cut revealed the fracture of sore tooth imediatelly while the normal OPG image didn’t show the problem as clearly.
The dentist saved a lot of time thanks to the Section tab and gained confidence in his diagnosis.
2) Max Sharpen filter
Max Sharpen filter is one of the adjustments the Section tab provides for the best possible display of images. This filter allows for a maximum level of sharpening of the edge of the image.
That is not all that can be found in the Section tab – there is a slider which adjusts the brightness of the image and there is a slider for the adjustment of contrast as well. It is possible to smooth the images, multiple levels of sharpening are provided, and so is the inversion of black and white.
The control panel of the Section tab is very intuitive and will help with any diagnosis.
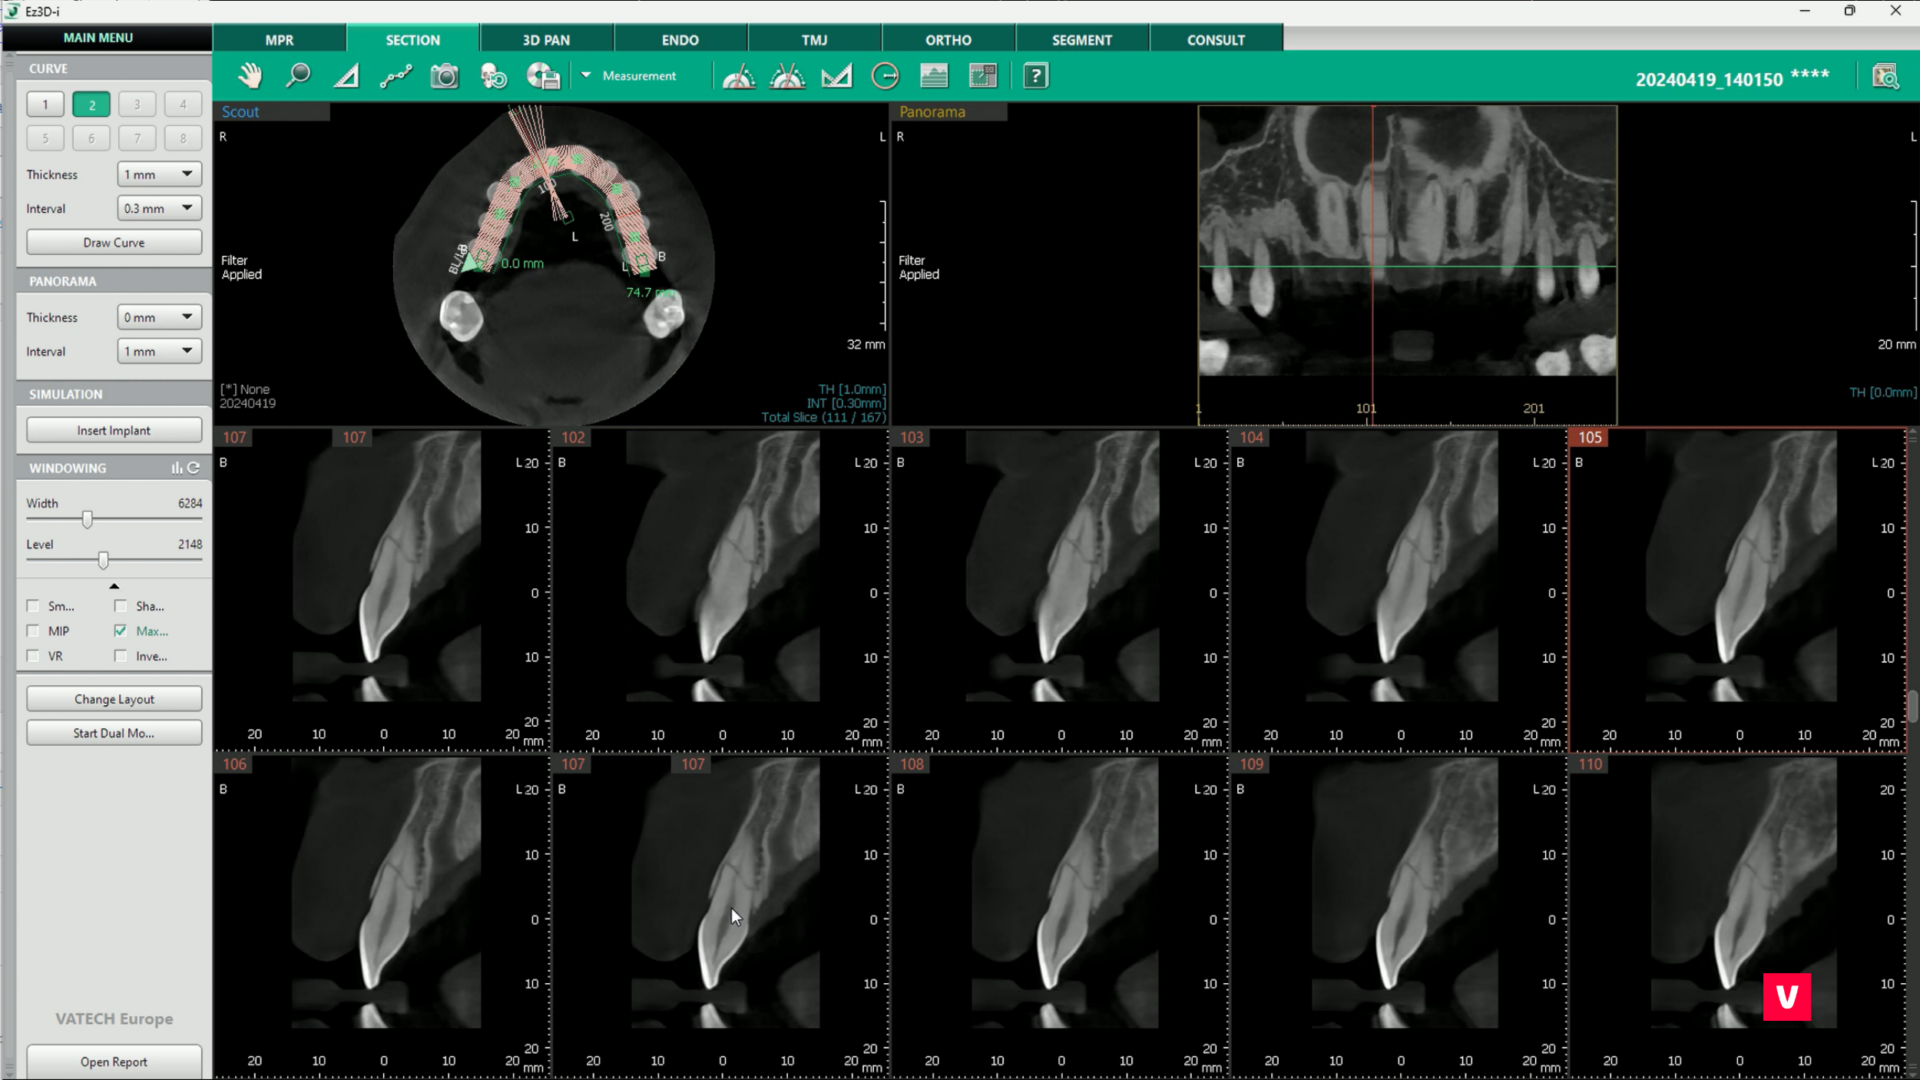
3) Layout modification
The Section tab also has a lot of possibilities when it comes to layout – whichever layout will help the most is the one that you can use during your diagnostic work. There is a lot of customization options in case you are struggling to find the tooth pathology.
In the case of the patient, the problem was quite clear once we did the coronal plane cut so the modifications were not as necessary as they might be in more complicated cases.
Here is a quick overview of how we used the functions mentioned above to do a diagnosis of the patient.
If you have any pointers or questions, please, contact us, we would love to get your professional experience on the matter of diagnosis.
For more Clinical Cases, please click here.